
P. O. Box 13322
Sacramento, CA 95813-3322
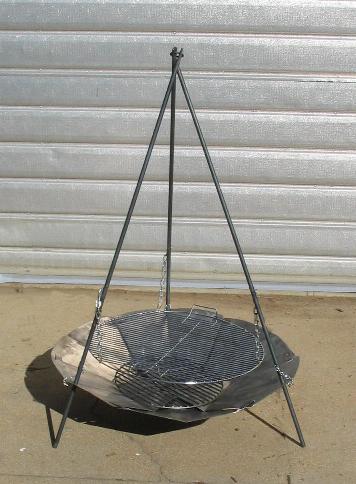
 There are four basic components to the firepit: the bowl, the tripod, the cooking grill, and the coal grate. To set up the bowl, spread out the petals to form a circle, as shown at left. You will notice that half the petals have a clip on each side. The other half of the petals will have a slot on each side. Arrange the petals so that the two types alternate. Now clip the petals together by allowing the clip to fit into the slot on the adjacent petal. You will find that, to slip the last clip into the last slot, you'll have to force the two petals closer together. (You may find this easiest to do by tipping the bowl onto its side.) This tension helps keep the bowl assembled.
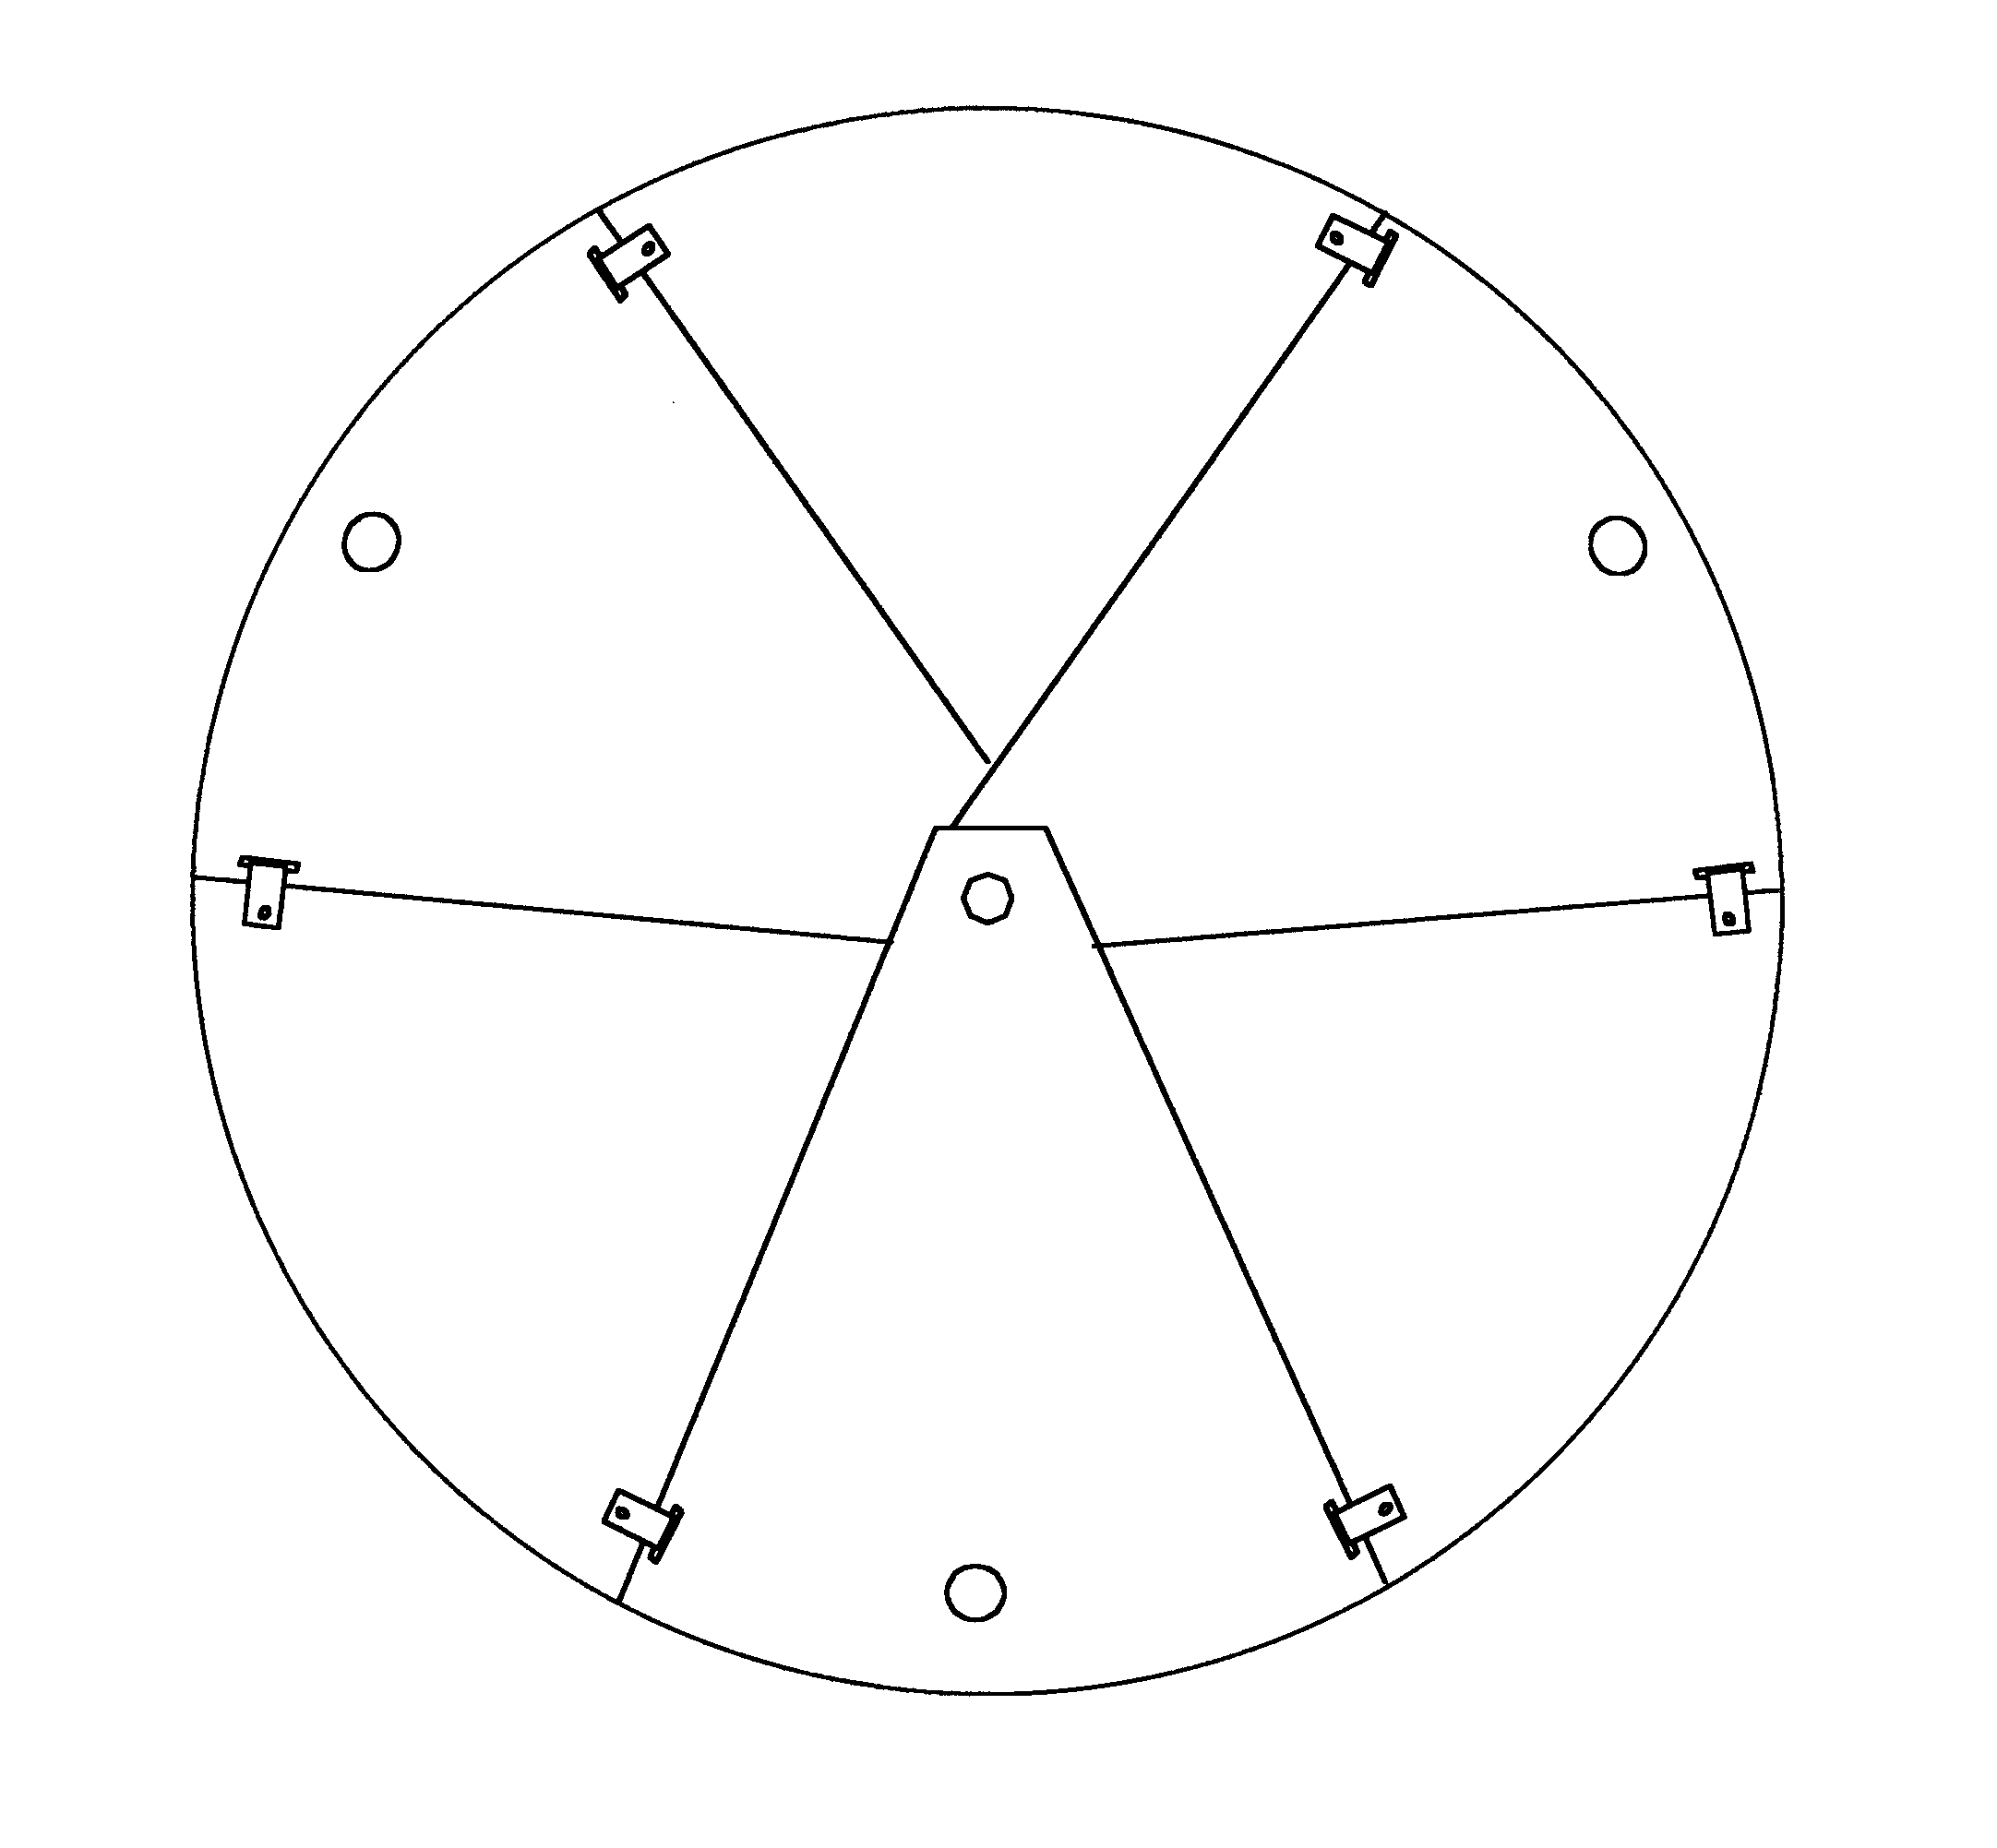 Now take the tripod and note that there are hooks mounted on it about halfway down its length. Arrange the tripod so that when it's spread out properly, the hooks are facing inward. This isn't really critical, but makes it a tad easier to adjust the height of the grill. Put the legs of the tripod through the holes in the bowl (on the petals where the slots are) and lift up on the bowl to spread the legs further.
On each leg, there's a locking pin tethered to the leg by a chain, and a little hole in the leg below the pin. The bowl is pushed beyond the level of the hole, and the pin is slipped into the hole. When all the pins are in place, the weight of the bowl should be resting on the pins. See the left-hand figure below:
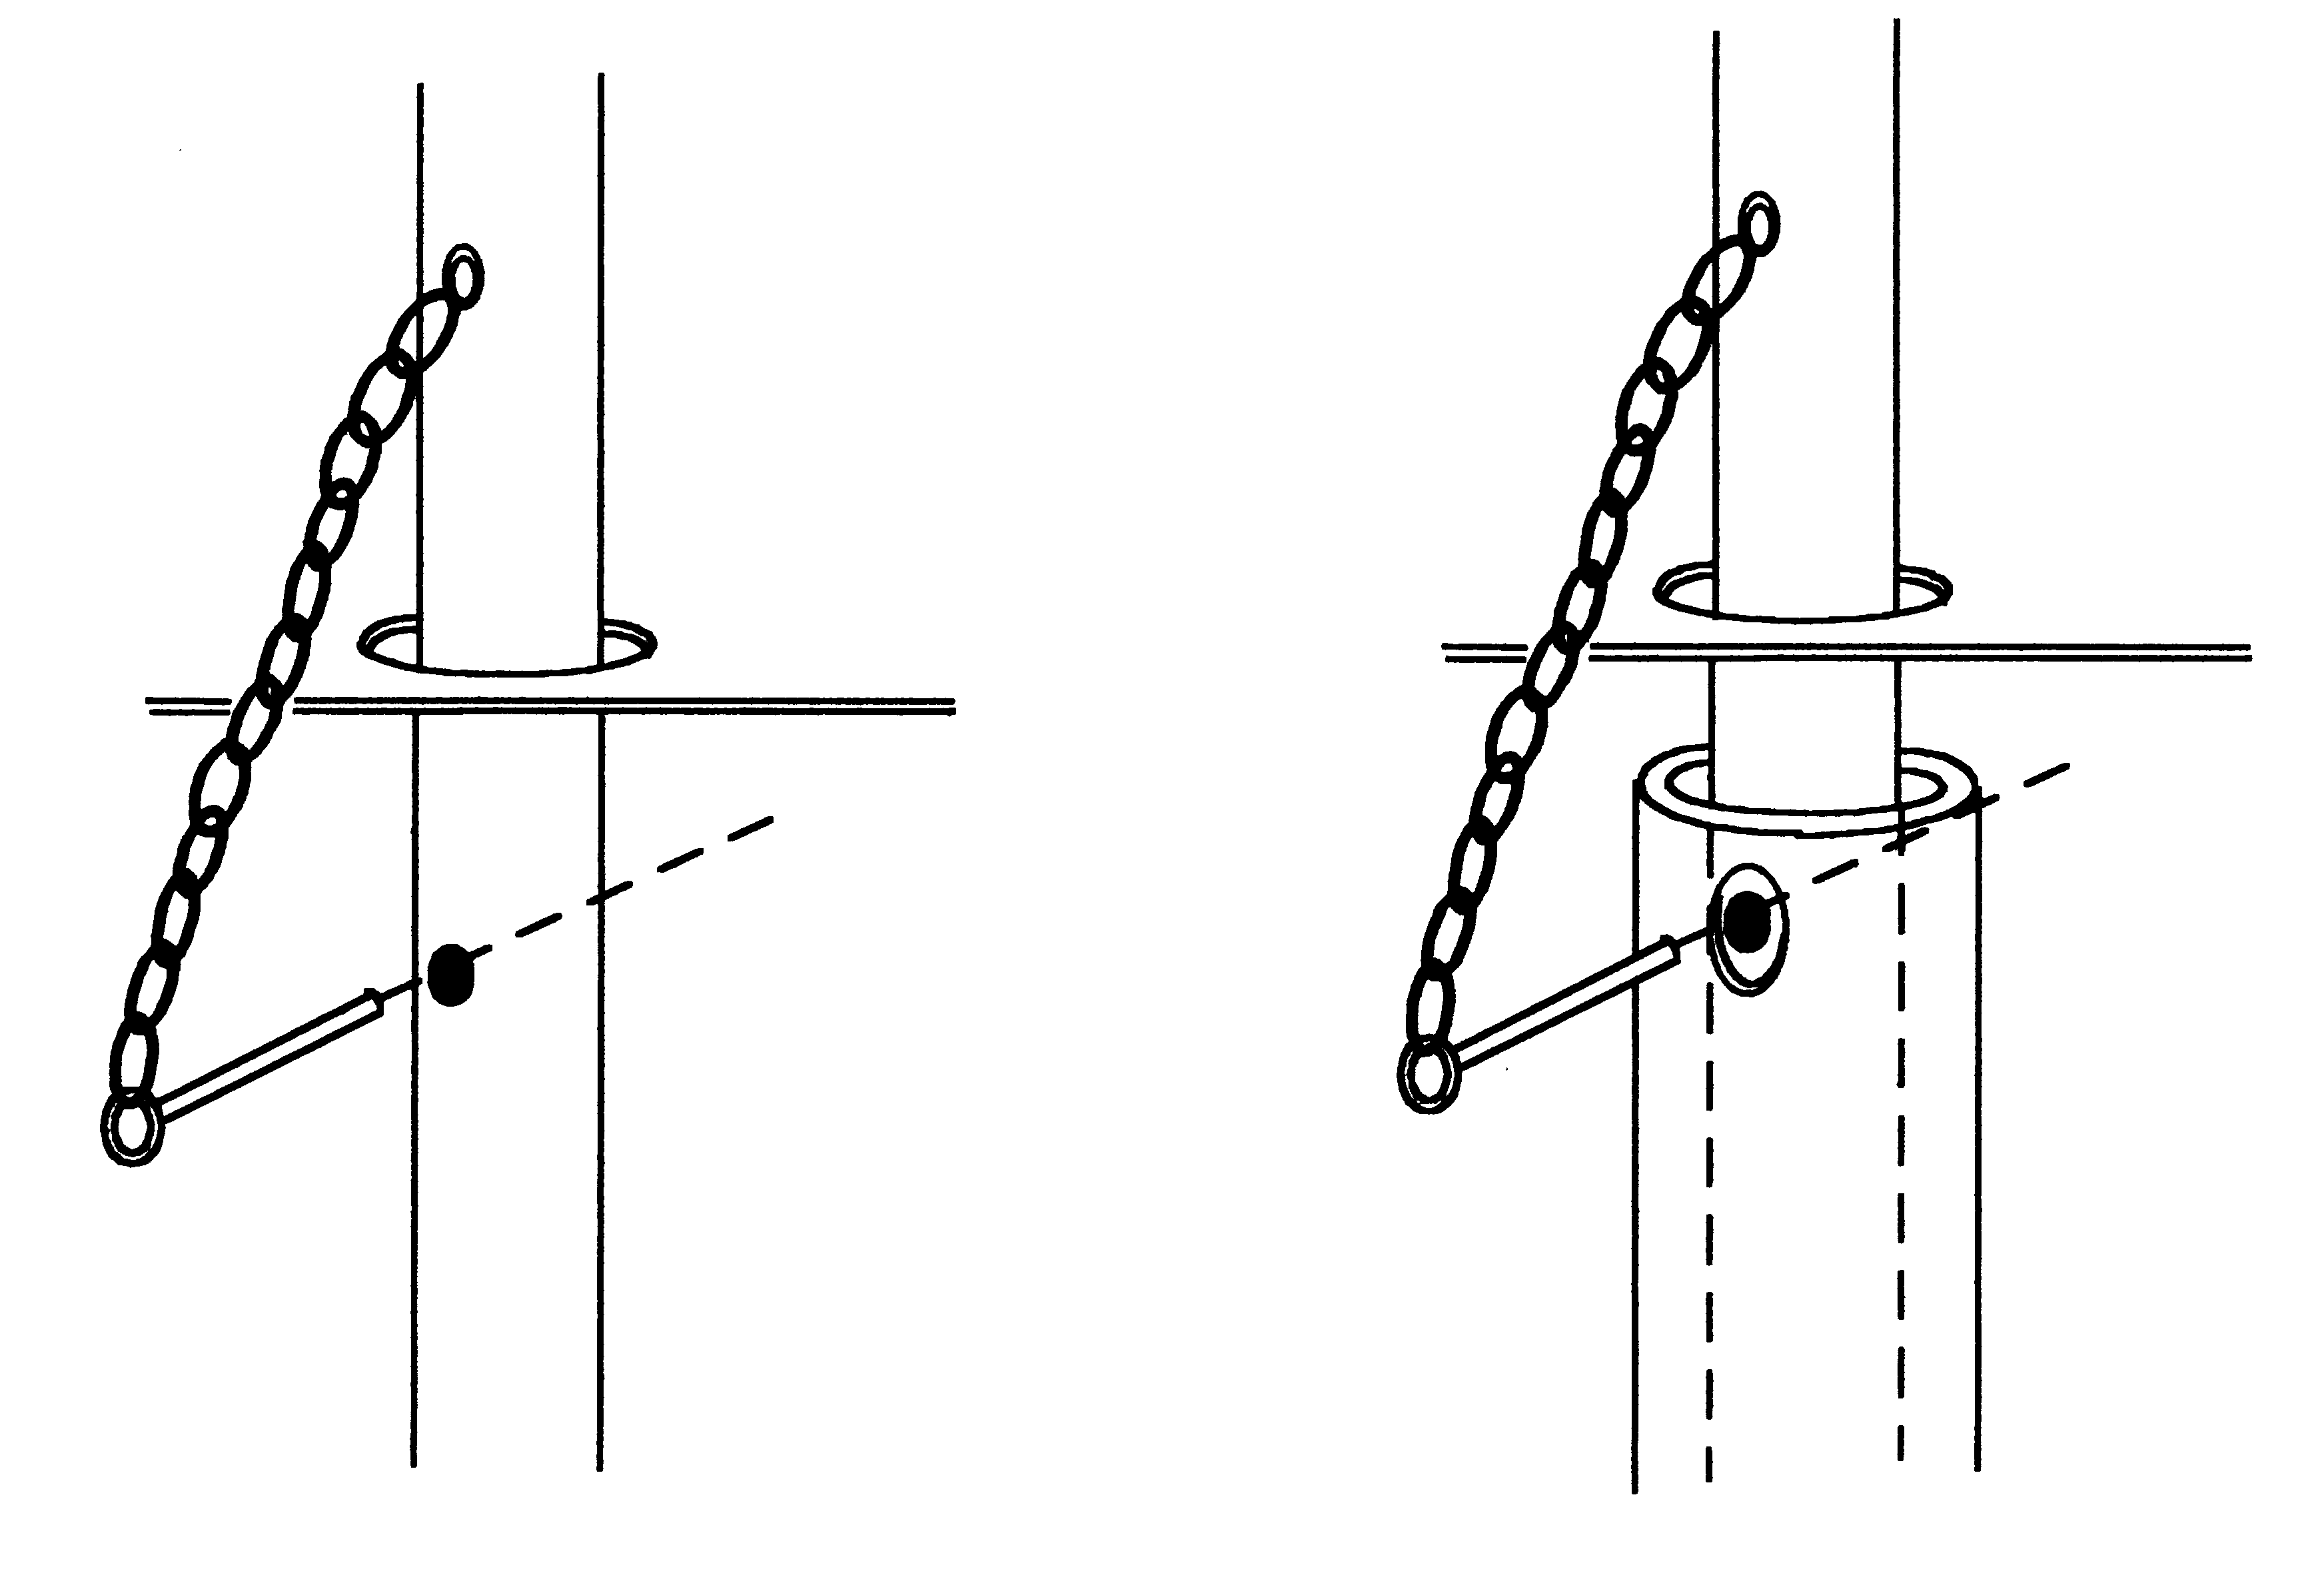
If you're using the leg extensions, slide them onto the legs before you insert the locking pins, the ends with the holes first. These holes should line up with the locking pin holes on the tripod leg itself, pushing the bowl just a tad higher than it would normally sit. The locking pin goes through both the extender and the leg. This assures that if the firepit needs to be moved, the extenders will go with the legs. See the right-hand figure, above.
Now drop the coal grate onto the bowl. It provides a little draft under the coals to keep them burning and also keeps the bottom of the firepit bowl a little cooler. At this point, you can build a fire in the firepit and enjoy a bardic session. Or if you want to cook, you can hang the grill onto the tripod using the chain and hooks. The height of the grill is adjusted by using more or fewer of the links on each segment of chain. You have about seven inches of adjustment, more than you'll probably ever need. Once the cooking is over, the grate is easily removed so a conventional campfire can be built in the bowl. The ring at the apex of the tripod is large and strong enough to accomodate a pot hook, so that cooking pots can be suspended over the fire instead of being placed on the grill.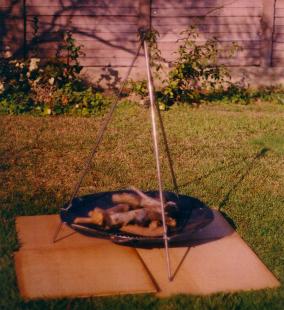 if you're camping in a dry environment and are worried about sparks, we recommend that you carry some squares of plywood to lay under the firepit. the pieces we use are two feet square, and we made them from a 4' x 8' piece of the thinnest plywood we could get at our local home improvement center, which was 3/16" thick. (this stuff is often called "door skin" because the surfaces of interior doors are often made of it.) A sheet will yield eight squares. Or you might find a bargain in damaged paneling ... a corner broken off or a big scratch in the veneer won't detract from you intended use.
Four squares, slightly overlapping, will cover about fifteen square feet of area, which should protect the ground adequately against embers that drop from the firepit. Of course, nothing beats a vigilant eye and a quick response to any sparks that explode from the fire. No fire should ever be unattended, and no fire should be without some sort of fire extinguisher, even if that extinguisher is simply a bucket of water and sand.
Always keep a careful head around fires, and be sure to supervise any children in the area. Because this firepit is based on a triangle configuration with a low center of gravity and a wide base, it is unusually stable (more so, in fact, than most commercial charcoal grills). Putting on the leg extenders will raise the center of gravity somewhat, of course, but this is partially compensated for by the increased width of the base.
The firepit can be moved, even when there is a fire in it, by two people who are careful about what they're doing. There are two methods. In the first method, the firepit is picked up by the legs, with one person grasping two legs and anther person grasping the third. The legs under the level of the bowl will be cool to the touch, even with a hot fire in the bowl.
In the second method, a rod or poker is slid under the apex ring of the tripod. Two people can then lift the firepit by the tripod and re-position it where they like. One must be careful to keep the rod perfectly level to prevent the tripod from slipping on it and sliding down to one end. If the firepit is fitted with the leg extenders, it is important that the locking pins pass through the extenders as well as the legs; otherwise, the extenders would fall off when the firepit was lifted.
if you're camping in a dry environment and are worried about sparks, we recommend that you carry some squares of plywood to lay under the firepit. the pieces we use are two feet square, and we made them from a 4' x 8' piece of the thinnest plywood we could get at our local home improvement center, which was 3/16" thick. (this stuff is often called "door skin" because the surfaces of interior doors are often made of it.) A sheet will yield eight squares. Or you might find a bargain in damaged paneling ... a corner broken off or a big scratch in the veneer won't detract from you intended use.
Four squares, slightly overlapping, will cover about fifteen square feet of area, which should protect the ground adequately against embers that drop from the firepit. Of course, nothing beats a vigilant eye and a quick response to any sparks that explode from the fire. No fire should ever be unattended, and no fire should be without some sort of fire extinguisher, even if that extinguisher is simply a bucket of water and sand.
Always keep a careful head around fires, and be sure to supervise any children in the area. Because this firepit is based on a triangle configuration with a low center of gravity and a wide base, it is unusually stable (more so, in fact, than most commercial charcoal grills). Putting on the leg extenders will raise the center of gravity somewhat, of course, but this is partially compensated for by the increased width of the base.
The firepit can be moved, even when there is a fire in it, by two people who are careful about what they're doing. There are two methods. In the first method, the firepit is picked up by the legs, with one person grasping two legs and anther person grasping the third. The legs under the level of the bowl will be cool to the touch, even with a hot fire in the bowl.
In the second method, a rod or poker is slid under the apex ring of the tripod. Two people can then lift the firepit by the tripod and re-position it where they like. One must be careful to keep the rod perfectly level to prevent the tripod from slipping on it and sliding down to one end. If the firepit is fitted with the leg extenders, it is important that the locking pins pass through the extenders as well as the legs; otherwise, the extenders would fall off when the firepit was lifted.
Contents ©2002 by Dragonwing