
There are basically three ways to connect the center pole to the ridge pole. The first, and worst, way is to have a hole at each end of the ridge pole, into which the spike of the center pole is fed. The trouble with this method is that both center poles have to remain at right angles to the ridge pole at all times, and that they have to be raised in unison. Otherwise, either the spikes would bend or the ridge pole would crack. I've seen a few tents still made this way, but most manufacturers have gone to the next method.
This second method replaces the hole in the ridge pole end with an eye-bolt big enough to accomodate the center pole spike, as shown in Figure 1. You'll notice that the ridge pole's bottom has been pared down at the end to allow more flexibility in the joint.
 |
|---|
| Figure 1: Joint using eye-bolt |
This is the system that I used with most of my own ovals, because it's inexpensive and fairly reliable. It's also versatile enough to accommodate your choice of banners, finials, or nothing at all for the ornament at the top. But it was designed for tents that use side poles, the idea being that the side poles get raised first (with the ropes already attached and staked out, as mentioned in the earlier article), and then the center-pole/ridge-pole assembly is raised. (If this explanation isn't clear to you, you can find the entire set-up method described in the Oval Pavilion Owner's Manual.)
But when I made a few oval tents without any side poles, I found that this system didn't work as well as it might have. These tents were modified hub-and-spoke designs, and I needed to find some way of getting the tent raised by the center poles alone. That's when I remembered the method I used on the Royal Pavilions, and adapted it to the new design. It was the ideal joint because it not only allowed the center poles to assume any angle they pleased with the ridge pole, from parallel to perpendicular, but it also prevented the center poles from putting any torque whatsoever on the ridge pole.
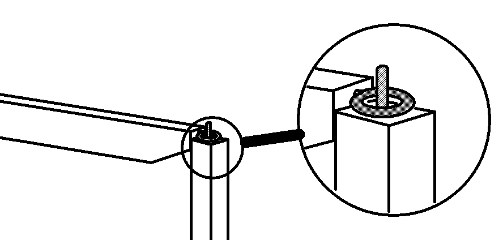
The connection between the center pole and the ridge pole is a hinge:
 |
|---|
| Figure 2: The hinge connecting the center pole and the ridge pole |
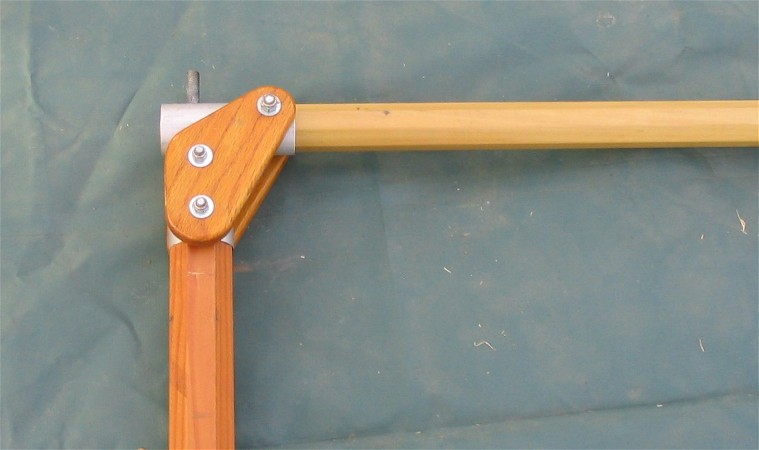
This joint can be flexed so that the center pole can be folded against the ridge pole:
 |
|---|
| Figure 3: The same hinge, flexed |
You'll notice one thing right away, and this is key to the way the mechanism works: the spike is not in the center pole, but in the ridge pole. This means that, no matter what angles the center poles are with respect to the ridge poles, the fabric isn't going to get stretched, and it won't interfere with the range of motion of the joint. This particular tent uses short threaded spikes, upon which finials are screwed, but longer spikes can also be used. The finials serve another purpose, which you'll see shortly.
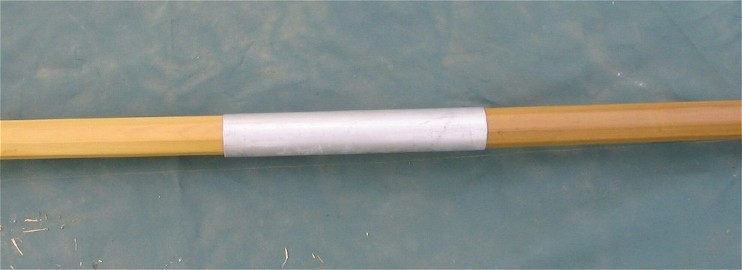
The second component that makes the system work is the sleeve in the center of the ridge pole. This sleeve does more than simply join the two halves together. The important thing is that it's round, and it's attached to one of the ridge pole halves. The second half slips into the socket, but it's free to rotate within it.
 |
|---|
| Figure 4: The ridge pole sleeve |
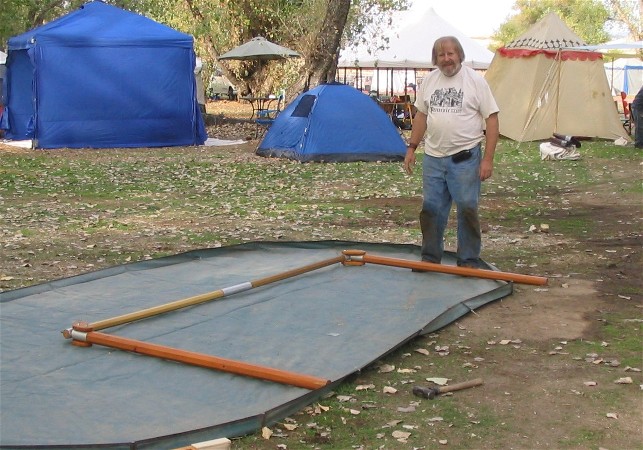
The assembled system is laid on the ground where you want the tent to be set up. In this case, it's laying on the fitted ground cloth for the tent.
 |
|---|
| Figure 5: The frame positioned on the ground. |
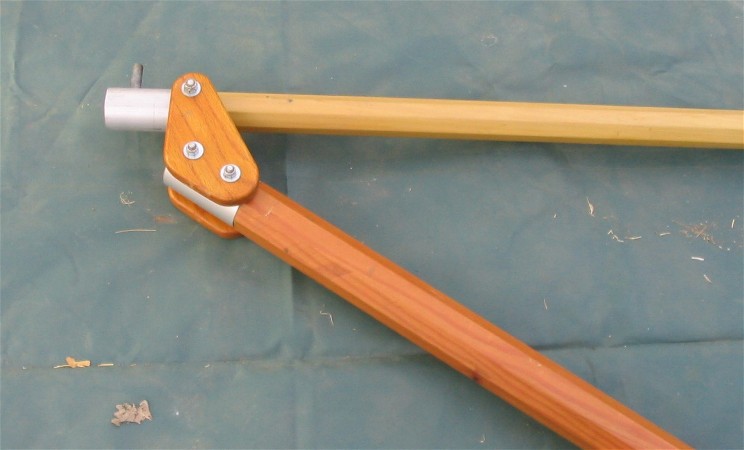
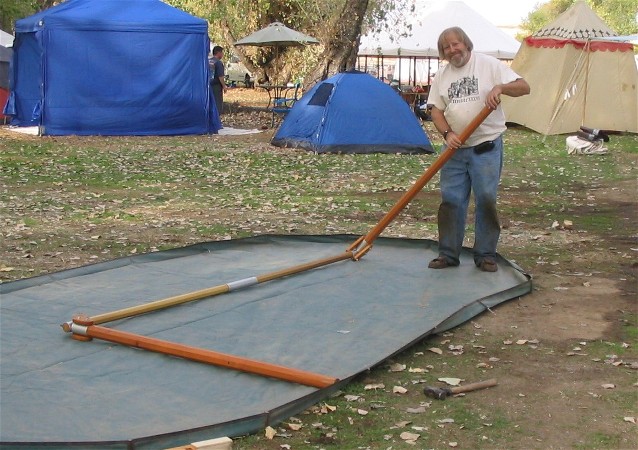
In the picture below, the frame is complete except that the lower halves of the center poles haven't been fitted to the upper halves yet. This is to show you how I can grab one center pole and rotate it first one way:
 |
|---|
| Figure 6: The pole flexed up |
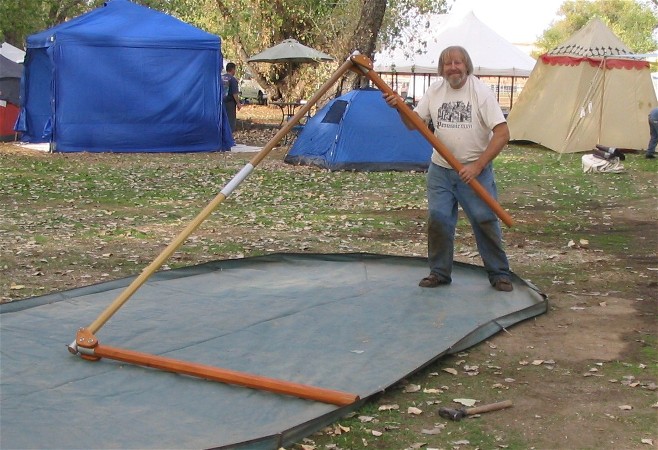
And then the other way:
 |
|---|
| Figure 7: The pole flexed down |
without the other center pole budging an inch. This is what the ridge pole sleeve allows me to do.
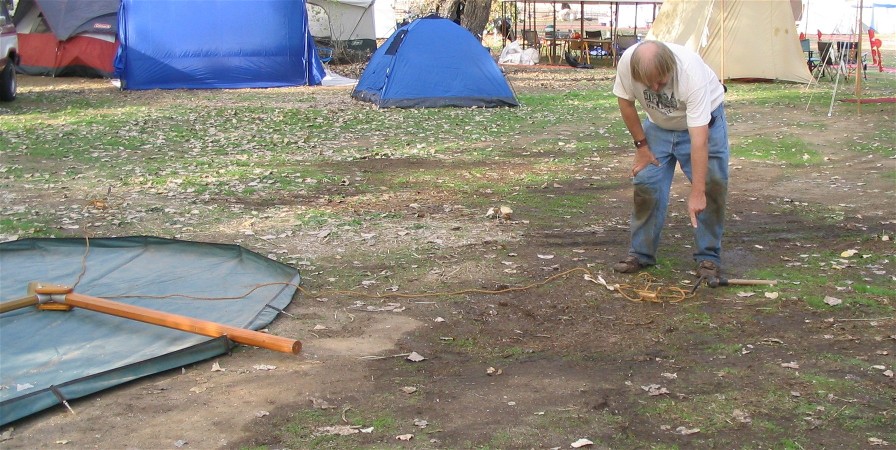
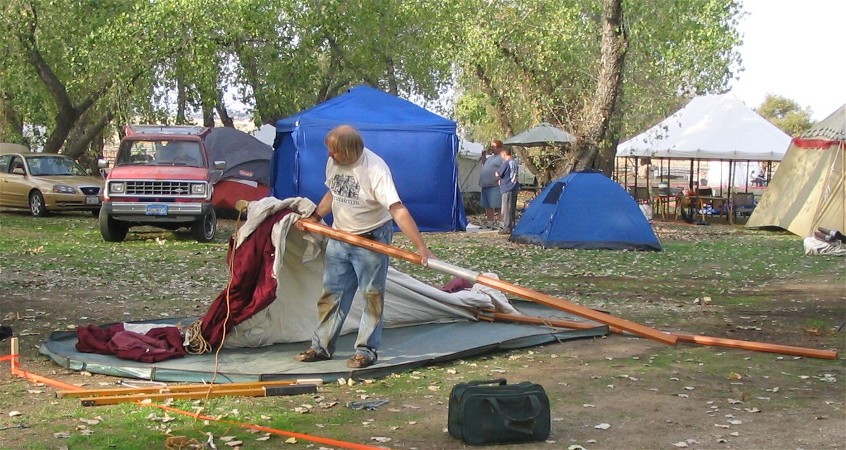
The next step is to locate where the wind line stakes go. With the ridge pole laying on the ground (or ground cloth) exactly between where the center poles will eventually sit, I stretch the tent roof over the ridge pole and put the spikes through their respective grommets in the roof. Then I slip the loop at the end of each wind line over the spike, and screw on the finials to keep the ropes in place. Keeping the ridge pole properly located, I stretch out the wind lines at a forty-five degree angle from the ridge pole, and drive a stake at a distance at least equal to the height of the center poles. In the picture below, I'm pointing at one of the stakes just next to my left foot. There are four of these wind lines altogether, two from each end of the ridge pole. Finally, I adjust the ropes to where they'll be approximately tight when the poles are up (figure a length approximately half again as long as the center pole, and you'll be close enough), and slip the loops onto the stakes.
 |
|---|
| Figure 8: Positioning the wind lines |
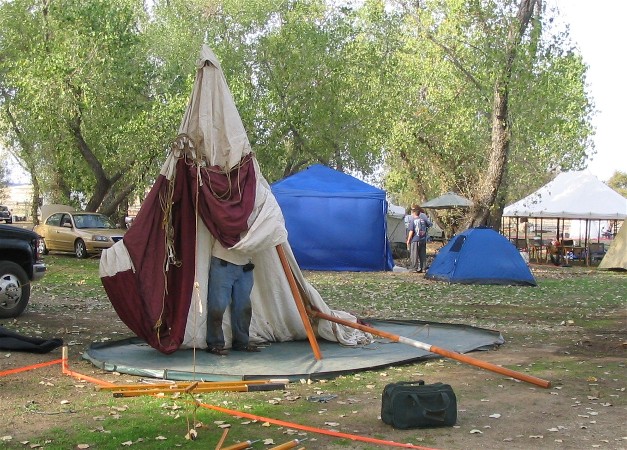
Now the fun part begins. I've assembled the center pole halves, and am preparing to lift up the first center pole. If there's any wind, this would be the pole on the windward side of the tent.
 |
|---|
| Figure 9: Raising the first center pole |
Up it goes:
 |
|---|
| Figure 10: Still raising the first center pole |
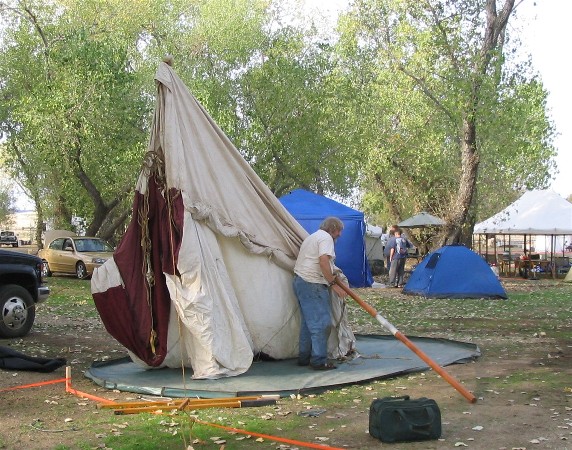
And it's almost all the way up.
 |
|---|
| Figure 11: Center pole almost up |
You'll notice that, since the ridge pole is a tad shorter than the center poles, its opposite end is actually off the ground. But no matter, because the joint system allows that to happen without stressing the fabric or the frame at all. And the wind lines will keep the pole vertical. Now the other center pole gets raised
 |
|---|
| Figure 12: Raising the second center pole |
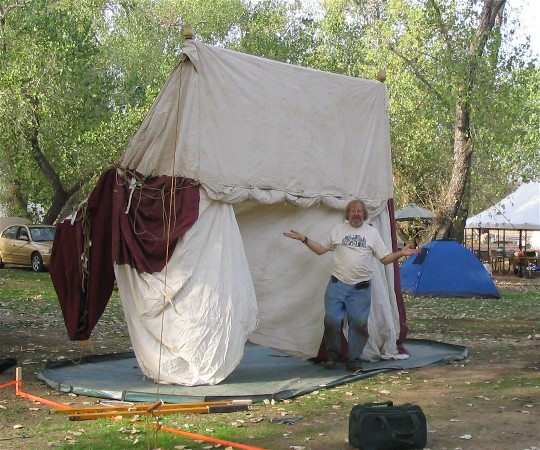
And the tent is up!
 |
|---|
| Figure 13: Voila! |
The wind lines will hold the pole erect while I busy myself putting the half-hubs onto the center poles and putting in the spokes. If I were using the kind of hub the center pole slips into, of course, I would have put them on the center poles before the tent was raised.